Slackistrano
Send notifications to Slack about Capistrano deployments.
Requirements
- Capistrano >= 3.8.1
- Ruby >= 2.0
- A Slack account
Installation
-
Add this line to your application's Gemfile:
gem 'slackistrano'
-
Execute:
$ bundle -
Require the library in your application's Capfile:
require 'slackistrano/capistrano'
Configuration
You have two options to notify a channel in Slack when you deploy:
- Using Incoming WebHooks integration, offering more options but requires one of the five free integrations. This option provides more messaging flexibility.
- Using Slackbot, which will not use one of the five free integrations.
Incoming Webhook
-
Configure your Slack's Incoming Webhook.
-
Add the following to
config/deploy.rb:set :slackistrano, { channel: '#your-channel', webhook: 'your-incoming-webhook-url' }
Slackbot
-
Configure your Slack's Slackbot (not Bot).
-
Add the following to
config/deploy.rb:set :slackistrano, { channel: '#your-channel', team: 'your-team-name', token: 'your-token' }
Optional Configuration & Overrides
By default Slackistrano will use a default icon and username. These, can be overriden if you are using the default messaging class (ie. have not specified your own).
-
Configure per instructions above.
-
Add the following to
config/deploy.rb:set :slackistrano, { ... username: 'Foobar the Deployer', icon_emoji: ':thumbsup:', # takes precedence over icon_url icon_url: 'https://avatars2.githubusercontent.com/u/16705?v=4&s=40', ... }
Test your Configuration
Test your setup by running the following command. This will post each stage's message to Slack in turn.
$ cap production slack:deploy:test
Usage
Deploy your application like normal and you should see messages in the channel you specified.
Customizing the hooks
If you wish to take control over when and what slackistrano hooks are fired, then you can use the option in deploy.rb:
set :use_custom_slackistrano_hooks, trueThis allows you to set custom hooks for all the slackistrano tasks:
'slack:deploy:starting'
'slack:deploy:updating'
'slack:deploy:reverting'
'slack:deploy:updated'
'slack:deploy:reverted'
'slack:deploy:failed'
Customizing the Messaging
You can customize the messaging posted to Slack by providing your own messaging class and overriding several methods. Here is one example:
if defined?(Slackistrano::Messaging)
   module Slackistrano
     class CustomMessaging < Messaging::Base

       # Send failed message to #ops. Send all other messages to default channels.
       # The #ops channel must exist prior.
       def channels_for(action)
         if action == :failed
           "#ops"
         else
           super
         end
       end

       # Suppress starting message.
       def payload_for_starting
         nil
       end

       # Suppress updating message.
       def payload_for_updating
         nil
       end

       # Suppress reverting message.
       def payload_for_reverting
         nil
       end

       # Fancy updated message.
       # See https://api.slack.com/docs/message-attachments
       def payload_for_updated
         {
           attachments: [{
             color: 'good',
             title: 'Integrations Application Deployed :boom::bangbang:',
             fields: [{
               title: 'Environment',
               value: stage,
               short: true
             }, {
               title: 'Branch',
               value: branch,
               short: true
             }, {
               title: 'Deployer',
               value: deployer,
               short: true
             }, {
               title: 'Time',
               value: elapsed_time,
               short: true
             }],
             fallback: super[:text]
           }],
           text: "<!here> Application Deployed!"
         }
       end

       # Default reverted message.  Alternatively simply do not redefine this
       # method.
       def payload_for_reverted
         super
       end

       # Slightly tweaked failed message.
       # See https://api.slack.com/docs/message-formatting
       def payload_for_failed
         payload = super
         payload[:text] = "OMG :fire: #{payload[:text]}"
         payload
       end

       # Override the deployer helper to pull the best name available (git, password file, env vars).
       # See https://github.com/phallstrom/slackistrano/blob/master/lib/slackistrano/messaging/helpers.rb
       def deployer
         name = `git config user.name`.strip
         name = nil if name.empty?
         name ||= Etc.getpwnam(ENV['USER']).gecos || ENV['USER'] || ENV['USERNAME']
         name
       end
     end
   end
end
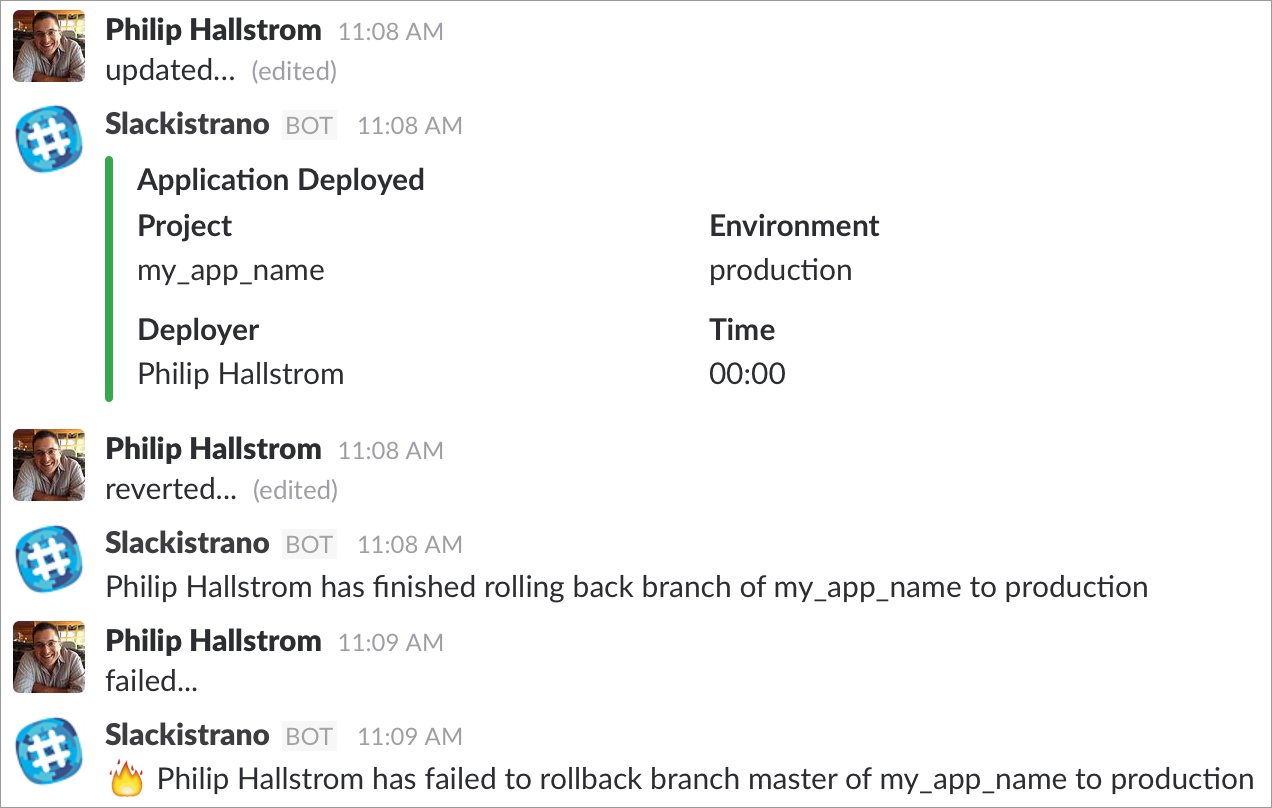
The output would look like this:

To set this up:
-
Add the above class to your app, for example
lib/custom_messaging.rb. -
Require the library after the requiring of Slackistrano in your application's Capfile.
require_relative 'lib/custom_messaging'
-
Update the
slackistranoconfiguration inconfig/deploy.rband add theklassoption.set :slackistrano, { klass: Slackistrano::CustomMessaging, channel: '#your-channel', webhook: 'your-incoming-webhook-url' }
-
If you come up with something that you think others would enjoy submit it as an issue along with a screenshot of the output from
cap production slack:deploy:testand I'll add it to the Wiki.
Disabling posting to Slack
You can disable deployment notifications to a specific stage by setting the :slackistrano
configuration variable to false instead of actual settings.
set :slackistrano, falseTODO
- Notify about incorrect configuration settings.
Contributing
- Fork it
- Create your feature branch (
git checkout -b my-new-feature) - Commit your changes (
git commit -am 'Add some feature') - Push to the branch (
git push origin my-new-feature) - Create new Pull Request