Spree Bank Transfer is an extension which allows adding a new payment method “Bank Transfer” to existing spree e-commerce store. With the help of this payment method customer can place an order online and pay by transferring money directly into merchant’s Bank account. This extension allow merchants to provide their bank account(s) details which in turn is used by customers to order and pay using this method. This extension also facilitate admin to Activate/Deactivate attached Bank accounts. Admin can also filter orders on the basis of the available payment transaction reference numbers with this extension.
Installation
Add spree_bank_transfer to your Gemfile:
gem 'spree-bank-transfer', require: 'spree_bank_transfer'For older versions of Spree.
# Spree 2.1.0
gem 'spree-bank-transfer', '2.1.0', require: 'spree_bank_transfer'
# Spree 2.0.x
gem 'spree-bank-transfer', '2.0.5', require: 'spree_bank_transfer'Bundle your dependencies and run the installation generator:
bundle
bundle exec rails g spree_bank_transfer:install
How it works:
-
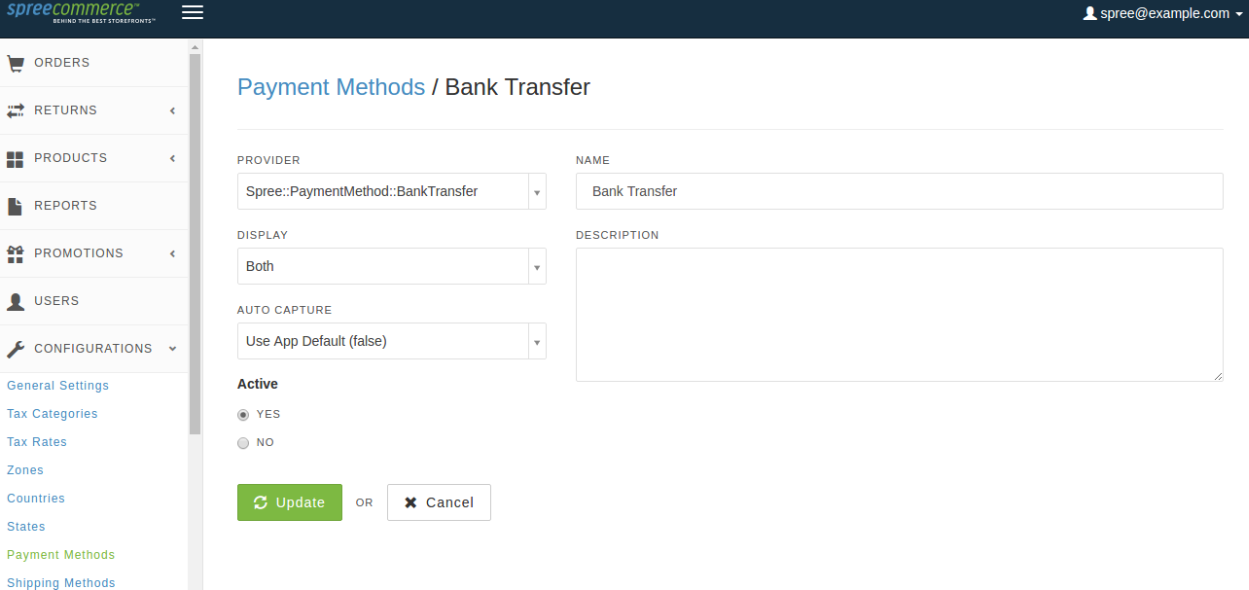
To add Bank Transfer feature, Admin needs to add “Bank Transfer” payment method:
Configuration -> Payment Methods -> New payment Method
You need to select “Spree::PaymentMethod::BankTransfer” as the Provider
 -
Add bank account information from “Banks” link on “Configuration” page.
-
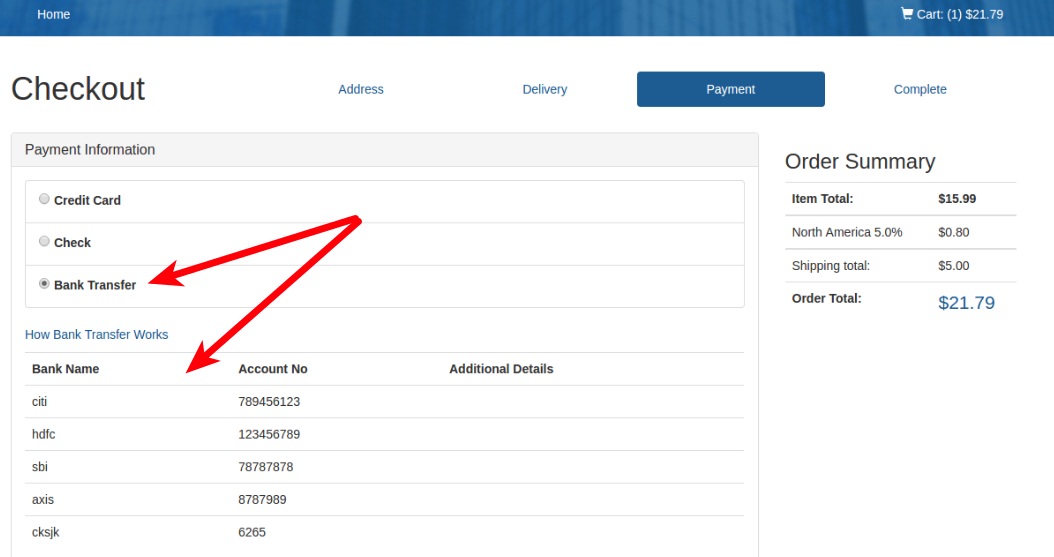
After adding the payment method and bank details (as stated above), this payment method will be visible on Checkout page while making payment against an order.
-
Active merchant accounts number will also be visible on Checkout page under this method.

“How Bank Transfer Works” link will open a pop-up window. It will list all steps to complete order with this method.
-
Customer will be able to order by completing the order with this method and can transfer money equal to total order
value directly into any one of the merchant’s bank account. -
After customer deposits money into merchant’s account, a payment transaction reference number is provided by the bank. Customer needs to add this payment reference details with the respective order by going to order detail page.
My Account -> Order no. -> Add details (Payment information column) -> Submit
-
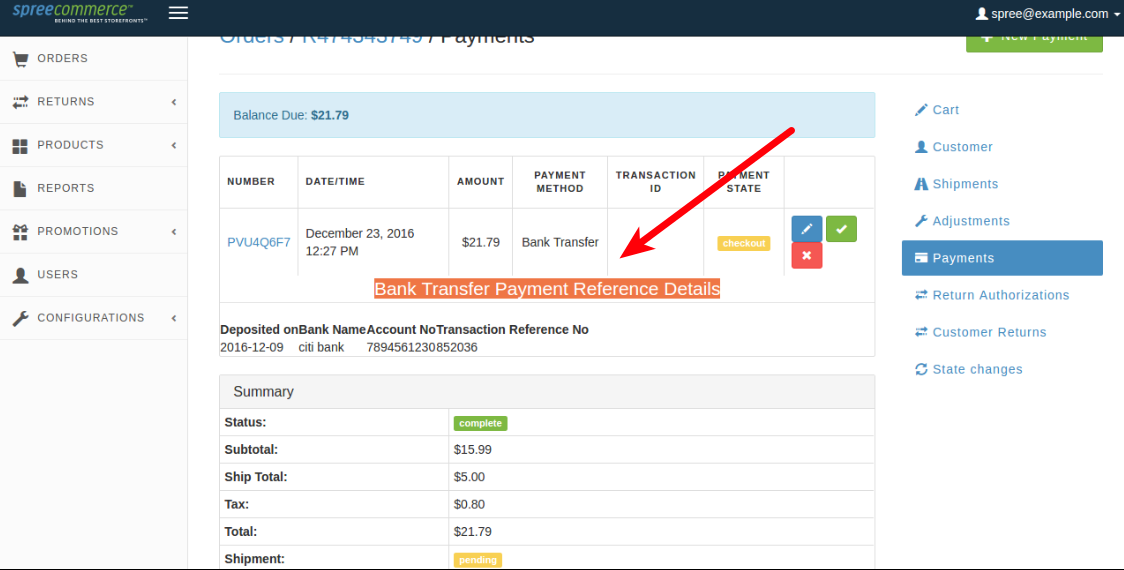
Admin will be able to see the payment reference details, added by customer, on the Order detail page.
Orders -> Order no. -> Payments  -
The order will not be marked Completed until admin captures the payment as mentioned in step above.
Note: Admin needs to manually verify the transaction details from his bank account before capturing the payment -
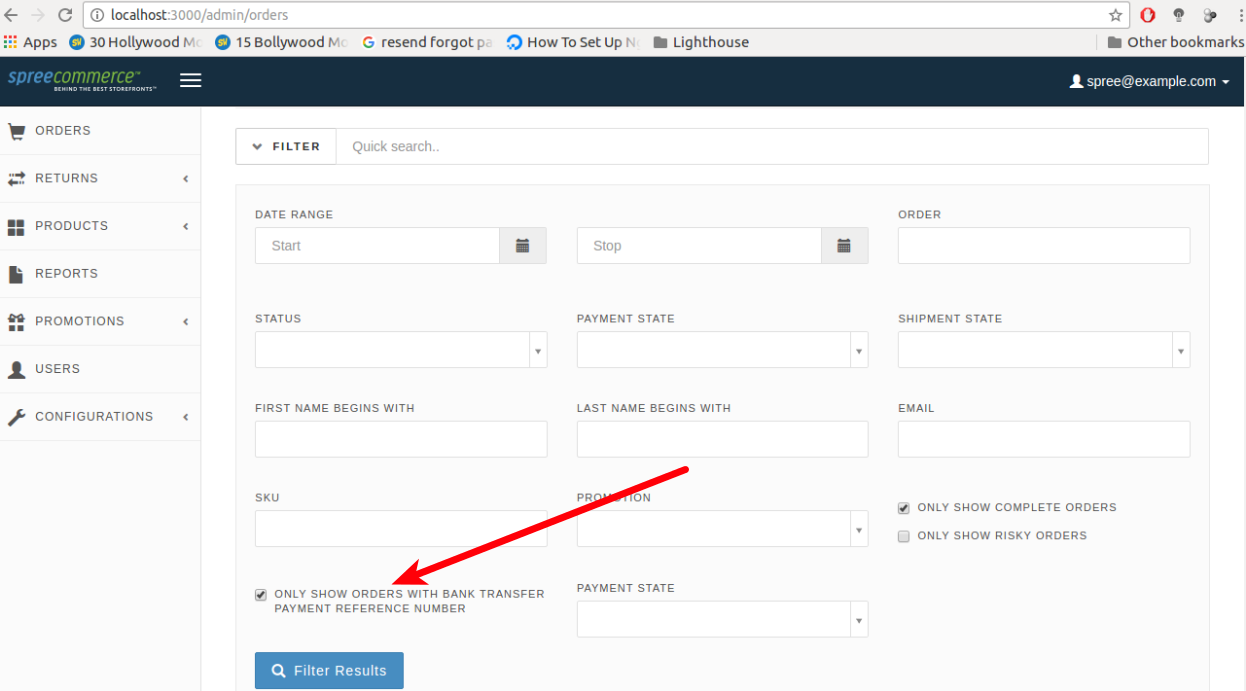
Admin can filter orders which has payment transaction reference number by clicking the check box “only show orders with bank transfer payment reference number” on “Orders” page.

Contributing
- Fork the repo.
- Clone your repo.
- Run
bundle install. - Run
bundle exec rake test_appto create the test application inspec/test_app. - Make your changes.
- Ensure specs pass by running
bundle exec rspec spec. - Submit your pull request.
Testing
Be sure to bundle your dependencies and then create a dummy test app for the specs to run against.
bundle
bundle exec rake test_app
bundle exec rspec spec
When testing your applications integration with this extension you may use it's factories. Simply add this require statement to your spec_helper:
require 'spree_bank_transfer/factories'Credits
Copyright (c) 2014 vinsol.com, released under the New MIT License